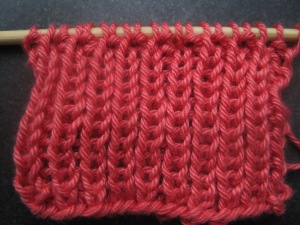
One of the main problems knitters encounter is keeping their ribbing looking neat. Ribbing, whether it be 1×1, 2×2 or whatever combination can look sloppy – the main reason for this is that the column of Knit stitches preceding a column of Purl stitches can often look wobbly and uneven.
So why does this happen to so many of us? Basically it is because in our Western style of knitting slightly more yarn is used as we transition from a Knit stitch to a Purl stitch and this excess bit of yarn causes the column of Knit stitches preceding the Purl stitches to look uneven and wobbly.
This may also be a familiar problem to those of you who knit cable patterns – the last column of Stocking Stitch preceding the cabled section can often look uneven and unsightly. But fear not dear knitty friends. I’m about to teach you a simple trick for making sure this never happens to you again and I’ll explain what you need to do for both knitting in the round and flat.
Perfect Ribbing in the Round
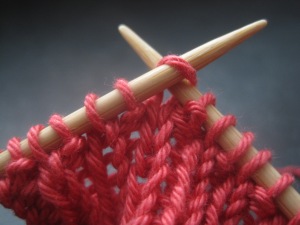
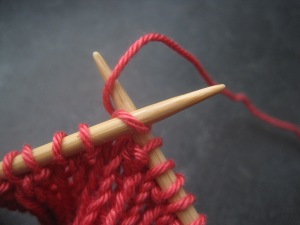
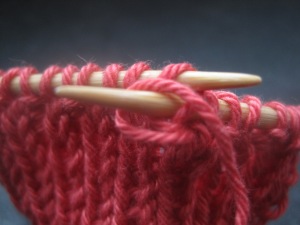
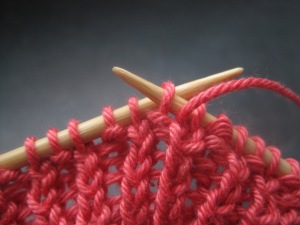
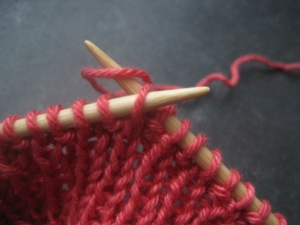
When you are next ribbing in the round, Knit all of your Knit stitches normally – For example, I knit the Western way, which is, to insert the right hand (RH) needle from front to back through the front of the stitch (photo below left). I then wrap my working yarn around the RH needle – which is now at the back of the work – clockwise (photo below right).
In this example I’m working 1×1 ribbing, so my next St is a Purl St. I insert my RH needle through the back leg of the St from back to front (photo below left) and I wrap the yarn around the needle clockwise (photo below right). This is the opposite way to which you will be used to wrapping the yarn for a Purl Stitch.
Wrapping the yarn in this clockwise fashion uses slightly less yarn than wrapping the normal counter-clockwise way and using less yarn tightens up the stitch and means that column of Knit stitches will sit tighter.
Work every round in this same way. If you are working a 2×2 rib then the procedure for the Purl stitch above only applies to the Purl stitch you first encounter after a Knit Stitch – the second Purl stitch of the two can be worked in the normal fashion.
Perfect Ribbing worked flat
If you are working your garment flat then you work your Right Side rows in the same way described above for working in the round. Knitting all Knit Stitches in the normal Western fashion and working the Purl Stitches (or at least, the first Purl Stitch you come to after a Knit Stitch has just been worked) through the back of the loop, wrapping the yarn clockwise.
When working Wrong Side rows you need to un-twist the twisted Purl Stitch from the previous row so you work Wrong Side rows as follows:
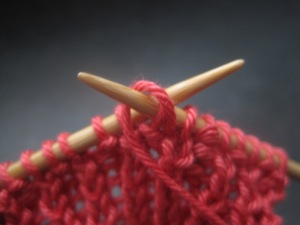
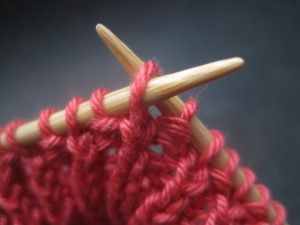
Purl the purl stitches (as they appear to you) in the normal Western fashion: Put your RH needle through the front leg of the stitch from back to front (photo below left). Wrap the yarn around the RH needle counter-clockwise (photo below right).
When you come to a Twisted Purl Stitch from the previous row – which now appears to you as a Knit Stitch – you work it as follows: Place RH needle through the back leg of the stitch from front to back (photo below left). Then wrap the yarn around the RH needle counter-clockwise (over the top of the needle from right to left – photo below right)
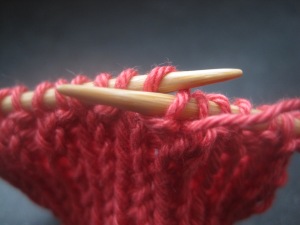
And voila! nice neat ribbing and neat St St edges before your cable sections! You need never be plagued by sloppy rib columns again! It’s worth mentioning here that keeping your tension nice and tight and even when ribbing will also help you to achieve a neater look. This is why most patterns instruct you to use a smaller needle size for your ribbing – not only will the garment have a nice snug fit but ribbing also looks neater if it’s tighter, so don’t let your tension loosen up when knitting your ribbing.
This was just the info I was looking for to clean up my sock cuffs and improve appearance.
LikeLike
Thanks Jane, Glad I could help!
LikeLike
Just wanted to say that this was tremendously helpful for me. Thanks to your wonderful explanation, the ribbing detail down the front of my matching hat and sweater look great!
Thanks again! ☺️
LikeLike
You’re very welcome – so glad this article helped you 🙂
LikeLike
Oh wow. What a great trick. This improved considerably the appearance of the ribs on my hat. Thanks!
LikeLike
No problem! Really glad it helped you 🙂
LikeLike
Thanks for this! I was about to give up on ever attempting to knit socks again. Just tried this technique and it works perfectly! THANK YOU!
LikeLike
Hi Kait – so glad to hear this helped you! 🙂 Happy sock knitting!!
LikeLike